Friday, June 29, 2012

Sensational Removal


Hi everyone! Today I want to talk about how I removed my Sensationail manicure. I am so annoyed right now because ALL WEEK I have been trying to get the video I took of the process off of my iphone and I have been unable to do it. I tried emailing it, uploading it right to YouTube, uploading it to facebook, plugging the phone in and downloading it, nothing worked! I am so sorry. I will try to explain the process the best I can.

Removal was not as bad as I was expecting. Reading other reviews made me DREAD the removal process but honestly with some patience it was not too bad.  Here's what I did:

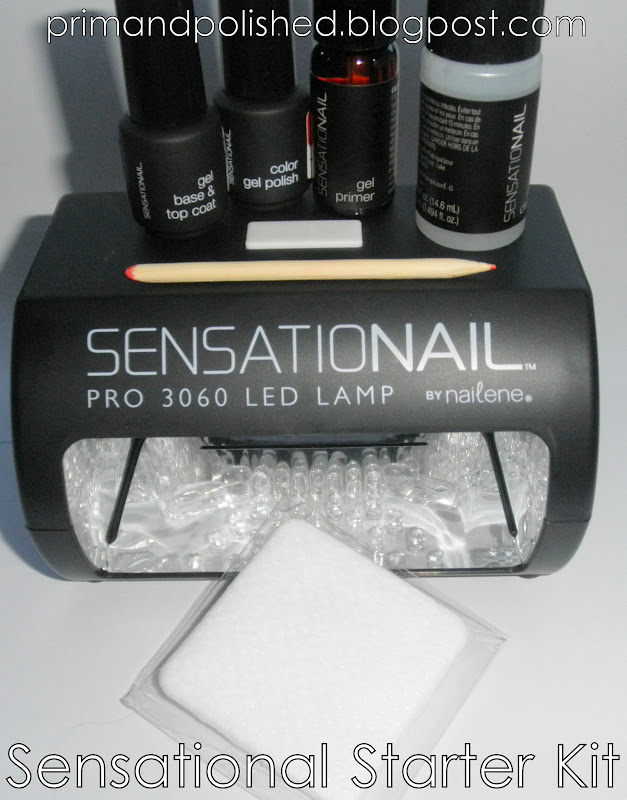
First I buffed off all of the shine with the file included in the kit. Then I used the glitter polish removal method and soaked cotton rounds in acetone and place them on my nails and wrapped them in foil. I let my nails soak for 15 minutes and then removed the foil/cotton. Once I removed the cotton/foil (which was on the VIDEO I can't show) it didn't look like the polish was going to budge. However, all I needed to do was take the manicure stick, provided in the kit, and scrape the polish off. The polish then flaked off, like dust. On spots that were harder to remove I simply used the nail file to buff it off.

While removal wasn't difficult I do feel like my nails were majorly dehydrated. I went a little overboard cutting them down after because they got really long over those 9 days, so the last photo of my shorter nails is not all the fault of Sensationail, I simply went a little crazy getting them shorter. They were not severely weakened from the maincure but they were dry and had virtually no shine.

Honestly it wasn't difficult to remove. Time consuming, yes, but difficult, no. I really wish I could get this video on here to show you because it came out good, but I cannot get the thing off of my phone!


Please let me know if you have any questions in the comments and I would be happy to explain the removal further!!! Have a great day!!!

Prim and Polished
Pin It Now!

Monday, June 25, 2012

Sensationail Update


Hello everyone! I hope you had a fantastic weekend. Steve and I had a great weekend. On Friday we went to the hibachi with some friends and had a blast. On Saturday we went to our nephew's 2nd birthday party. We had a great day! 


Steve and I at the hibachi:

I wanted to give you all a quick update on my Scarlet Red Sensational manicure. Today is day 9 and the manicure is going strong.  However my nails have grown a lot so it's driving me a little crazy. Other than that, they are still shiny and have not chipped. There is some tip wear but only on the very edges of the tips, it has not traveled to the tops of the nails at all. I am impressed.  Here's some photos from the last 9 days...


So far so good everyone. I am really impressed with this system.  When I remove it I will be sure to report back on removal.
Prim and Polished
Pin It Now!

Wednesday, June 20, 2012

On Wednesdays We Wear Pink: Nicole by OPI Strike a Pose

Hello my friends. Today is Pink Wednesday and though this is more coral than pink I am considering it pink for those purposes.

This is Strike a Pose which is part of the CVS exclusive Nicole by OPI  Kardashian Kolors Collection. On me this appears a true pinked coral but I have seen photos on other blogs where this appears to be a much darker orange-red color. Very strange.  Maybe it is my skin tone, I am not sure. It does have orange undertones but it's not full on orange. This color is really hot right now. I love how this looks on me and this is really a nice go to fun summer color.  I plan to rock this on my toes very often this summer.

I used two coats for full opacity and did not have any issues with application.  I still hate the shape of the Nicole by OPI bottles but I'll live. 


Like I mentioned above this color is exclusive to CVS stores and retails for $7.99 a bottle. Have you gotten your hands on this beauty? What do you think of it?

Sensationail Update:

Yesterday was day three of my Sensationail manicure and it's  still looking fresh to me.  The marks near the tips are from the camera flash. I have no chips and it's still nice and shiny. I love it so far. On to day four....


Prim and Polished

Disclosure: Sensationail was purchased by me with my own money. The Nicole by OPI product was provided by PR for review purposes. All reviews are 100% honest and done at my discretion. For more information please see my Disclosure Policy

Pin It Now!

Tuesday, June 19, 2012

Pixi Nail Color (Vivid Coral, Very Violet and Paradise Pink)


Hi everyone! Today I have some summer neons to share with you from Pixi. First up is Vivid Coral which drove my camera INSANE. It's so vibrant and neon I just couldn't get a photo that didn't look glowy.  I needed three coats for the opacity shown and I did still have a bit of VNL peeking through, almost in the way that a jelly can sometimes be.  The photos show the color with a shiny top coat (Seche Vite) because if you don't add a top coat to this it dries very matte.  Often neon colors will dry matte so this is nothing too out of the ordinary.  I liked this color a lot and wish my camera didn't have a panic attack when I photographed it.  Be careful with application on this one because it dries quickly and can be streaky if you don't pay attentionl. Adding a good top coat should even streaks out though.


Next up is Very Violet which also made my camera spaz out. In real life this is just a bit darker.   It too dries matte without a top coat and requires three coats for acceptable opacity. It's a fun color! 


Last up is Paradise Pink which is a really fun neon baby pink. It's hot pink, but baby pink at the same time. I love it. It's a really nice summer pedicure color in my opinion.  Same application as above except I did only need two coats for opacity on this one, it's very pigmented.  Careful application will minimize streaking and don't forget the high shine top coat to avoid the matte look. 


This was my first experience with Pixi polishes and overall I am satisfied but not dying to run out and purchase the whole line.  Neons are always a bit tricky so perhaps regular cremes or shimmers in the line will apply a bit easier. In terms of comparing these to other neons though they performed the way I would have expected them to perform.  Most neons I have used dry quickly with a matte finish and most require more than two coats to appear opaque, this is nothing new with the neon look. 

You can find Pixi at Target stores for $8.00. These bottles are 1/2 the size of most nail polish bottles so it's quite pricey for the size.  Pixi is considered a premium brand though so that explains the price.   If I ever see a unique color I'll pick one up but like I said above I won't rush out to collect them all. 

Have you tried Pixi polishes? What has been your experience. 


Sensationail Update:

Yesterday was day two with my Scarlet Red Sensationail manicure and so far so good. Looking fresh and super shiny! I used Badger Cuticle oil last night to keep my cuticles in shape.  I am 1/2 way through day three right now and I am still looking freshly manicured.  Stay tuned for further updates on the manicure though out the next week or two. 


Prim and Polished
Disclosure: Sensationail was purchased by me with my own money. The Pixi products were provided by PR for review purposes. All reviews are 100% honest and done at my discretion. For more information please see my Disclosure Policy


Pin It Now!

Sunday, June 17, 2012

Nailene Sensationail: Scarlet Red (Day 1)


Hi everyone! I hope you all had a nice weekend and gave your dad's some extra love on Father's Day! Today I want to show you my latest nail splurge.  I went ahead and purchased the Nailene Sensationail Starter Kit which is an at home gel polish kit similar to the ever so popular Shellac.  I had a Shellac manicure once, last year when I went on vacation, and while I liked the durability I did not like the acutal manicure I got. I found myself wishing I could just do that at home. Shellac isn't technically made for at home use (though I don't see why you couldn't use it the same way as you'd use this) and buying everything I'd need to do Shellac at home would be expensive, so when I saw this product on a few other blogs it piqued my interest. I have a vacation coming up in August and I was thinking of getting Shellac done again but then I decided "why not try that Nailene kit instead?" so I decided to buy it well before my trip to test it out.

I decided to purchase the Starter Kit which comes in Scarlet Red, Raspberry Wine or Pink Chiffon. I chose the Scarlet Red and I also purchased a polish in the color Taupe Tulips because I love greyed nudes; I plan to wear that one on vacation. The starter kit comes with an LED light, lint free cloths, a nail file (forgot to photograph that) manicure stick, a gel cleanser, gel primer, color gel polish and gel base/top coat.  There's enough product in the starter kit for 10 applications and the kit has everything you need to complete your gel manicure. Have a look at the starter kit (minus the nail file I didn't photograph) below:


I gave myself a manicure using this today.  Here's how it works:

I removed all polish from my nails, shaped my nails and buffed the top lightly with a nail file to remove all shine.  Then I washed my hands.  As instructed I took a lint free cloth with some of the gel cleanser and cleaned my nails of any debris.  I did my thumbs fully first then did all four remaining nails one hand at a time. First you apply a thin layer of the primer, just around the edges, including the free edge.  Then you apply a thin layer of the base/top coat (capping the nails) and cure under the lamp for 30 seconds (it lights up for 60 seconds but beeps at the 30 second mark). Then you apply one thin layer of color, cure for 60 seconds and repeat.  Finally you apply a thin layer of the base/topcoat and cure for 30 seconds. After curing you take the lint free cloth with some cleanser and wipe the surface of all nails (don't worry, they're rock hard, you won't ruin the manicure at all).  And that's it. Simple as can be.  There's literally no drying time at all after that final cure. After I wiped the nails with the cloth I went and folded laundry. No nicks, no smudging, just a perfect manicure, similar to Shellac at the salon.

Here's how it came out:


I think they came out pretty good for my first time. If you make any mistakes and get color on the skin you can wipe it with the manicure stick before curing. When I capped my nails I got some underneath and I just took my regular clean up brush with some acetone and wiped it before curing and it worked well. If you don't get it off the skin before curing it will be difficult (impossible) to remove so be careful. I didn't have many issues though, I just took my time and applied carefully. Honestly, to me, it applied like regular polish just be sure to remember to keep the layers thin.

I will keep you all posted on the durability of this product. It says it can last up to two weeks but if it lasts a week to 10 days I will be happy with it. I will probably mostly use this for vacations so I hate having chipped nails and didn't like my last Shellac manicure because I like to do my nails my way.  

I purchased this kit at CVS. It was $59.99 there but I had $5 Extra Bucks, a $3 off coupon from Sensationail's Facebook, and two $2 off beauty purchase coupon from CVS so it ended up being more like $47.99.... the second polish I bought was $11.99.  I know you can buy this at CVS and Walmart but I am not certain who else carries it. If it ends up lasting as long as Shellac then it's well worth the price because Shellac manicures are pretty expensive.  I plan on trying Shellac polish with this LED light as well, I think it should work (thoughts anyone?). 

Like I said, I will keep you posted on durability and will post on removal as well. I have heard removal is tough so we'll see. I plan to use cuticle butters and oils nightly to keep my cuticles looking nice during the week (two weeks?).  I will take photos along the way. 

Have you tried the Nailene Sensationail system? What did you think of it?

Prim and Polished
Pin It Now!

Thursday, June 14, 2012

OPI Pure Lacquer Nail Apps: Metallic Waves


Hi everyone. I hope this post finds you well. Today I have something pretty  cool to show you.  These are OPI's new Pure Lacquer Nail Apps, which are similar to the Sally Hansen products that we've been seeing in the drugstore for some time. These are nail strips, made of actual nail polish, that you peel off and stick onto your nails. The final result is instant nail art that looks like a professional manicure. 

I really like this product and I especially like the design,  Metallic Waves, which looks like zebra print with glitter in between the lines. I wish the shimmer was more evident in my photos because in real life these look awesome.  

Application was pretty easy. You find the strip that matches your nail size, peel off the clear plastic top and then peel the backing off to reveal the slightly sticky bottom and then stick onto the nail. Once you stick on the nail smooth it over the surface (I use an orange stick) and press firmly.  There will be excess over the tips, I tend to fold that under, sort of attempting to cap the nail, and then file off the excess.  There's a slight learning curve with these, however they are pretty simple to apply once you do it once or twice.

The only thing I don't love about them in the tips. Like I mentioned above I do try to cap the tips by folding the excess over, but once you remove the excess it's hard to actually have the tops capped.  So you're left with no polish on the edge, which drives me INSANE. It might be my problem with application but I can't seem to perfect that yet.  Any tips from users?

To remove just use your regular nail polish, these come off just the same.


These will run you about $11.95 where ever OPI is sold. 

So do you plan to try these out? Have you tried them already? What do you think?
Prim and Polished

Disclosure: This product was provided by PR for review purposes. All reviews are 100% honest and done at my discretion. For more information please see my Disclosure Policy.
Pin It Now!

Monday, June 11, 2012

Nail-Venturous: Floam


Happy Monday my friends. I hope you all had a nice weekend. I had a great one but like always it went by too fast for my liking. 

Today I have a special fun polish to share with you. This is a polish that many bloggers and nail lacquer addicts covet and I was lucky enough to have a fantastic friend purchase one for me last time it was in stock. Shout out to the lovely Alexis for picking this up for me and shipping it to me all the way from Canada. You rock!!! 

So what polish you ask? Well it's FLOAM! Remember Floam from your childhood? I do! That stuff was everywhere, and they still make it! This fabulous polish from Nail-Venturous captures all of those Floam memories in a nail polish, very cool and nostalgic! I love the whimsical uniqueness of this polish.

The polish itself is a matte neon blue and yellow-green fine glitter in a clear base. I used a topcoat for my photos, which is why it has a glossy appearance, but without the top coat this would dry matte. I used three coats and achieved full opacity which is wonderful for a glitter that is suspended in a clear base. This thing is packed with glitter. The final result is very reminiscent of its namesake, Floam, and I just think it's so much fun. 


You can purchase this, whenever it is in stock, at NinjaPolish.com for $9.00 USD. This color is tough to get you hands on so it will require some stalking to make it yours. I think it's worth it though because this polish is unique and so much fun for those of us who grew up in the 1990s.  

Thanks again to Alexis for stalking this and thinking of me when you bought it. I would never have been able to try it out if you didn't hook me up!

Have you tried Floam? What do you think of it? Worth the hype? Will you be stalking it!?
Prim and Polished
Disclaimer: A wonderful friend of mine sent me this as a gift :-) Thanks Alexis!
Pin It Now!

Friday, June 8, 2012

Essie: Clam Bake?!?


So I was recently at Ocean State Job lot checking out their nail polish collection and I stumbled upon something curious. All four of these Essie nail polishes were labeled Clam Bake. Looking at the stock image of Clam Bake from Essie's website I am thinking none of the four were really the color!

My question to you all is: do you think these ended up at Ocean State Job lot because they were simply mislabeled or do you think these were blatant fakes? I happen to think it was just a mislabel. I only had my cellphone with me so I couldn't take a photo of the labels but they all looked like actual Essie labels. Looks like QC at the Essie plant made a huge mistake. There were tons of these there in boxes. INSANE. 


So what say you? Mistake at the Essie factory or counterfeit polishes at Ocean State Job Lot? Have you seen anything like this before?
Prim and Polished
Pin It Now!

Wednesday, June 6, 2012

Pure Ice: FIVE Shades of Grey (Press Release)


I received this press release in my inbox today so I thought I would share. This is a cute take on the Fifty Shades of Grey craze. Who's reading the scandalous books? I couldn't resist the hype when everyone at work started reading them so I am currently on book two. 

_________________________

Pure Ice offers you the FIVE shades of Grey. 
When you are not busy enthralled in the world of Christian Grey and Anastasia Steele, take a break and do your nails.


Dark, charcoal gray carries with it some of the strength and mystery of black. It is a sophisticated color without much of the negative attributes of black.


Ready to see where Pure Ice can take you?


Prim and Polished
Press info and photos provided by PR.
Pin It Now!